 Pre built UI
2. Backend config
1) Create Lambda layer with required libraries#
- NodeJS
- Python
- Other Frameworks
Important
mkdir lambda && cd lambda

npm i -s supertokens-node @middy/core @middy/http-cors
mkdir nodejs && cp -r node_modules nodejs
zip -r supertokens-node.zip nodejs/
mkdir lambda && cd lambda

pip install --target ./python fastapi uvicorn mangum nest_asyncio supertokens-python
cd python && rm -r *dist-info **/__pycache__ && cd ..
zip -r supertokens-python.zip python/
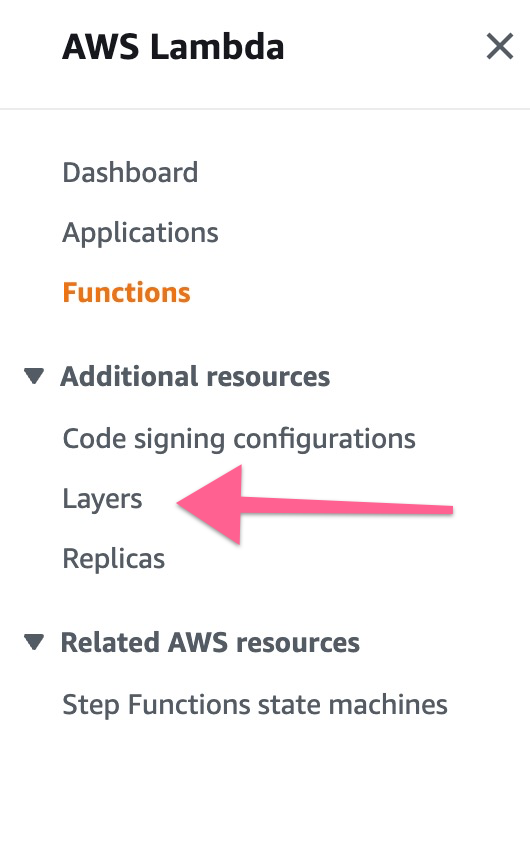
2) Upload SuperTokens lambda layer#
Open AWS Lambda dashboard and click on layers:
Click "Create Layer" button:

Give a name for your layer, upload the zip and select the runtime
- NodeJS
- Python
- Other Frameworks
Important
For other backend frameworks, you can follow our guide on how to spin up a separate server configured with the SuperTokens backend SDK to authenticate requests and issue session tokens.

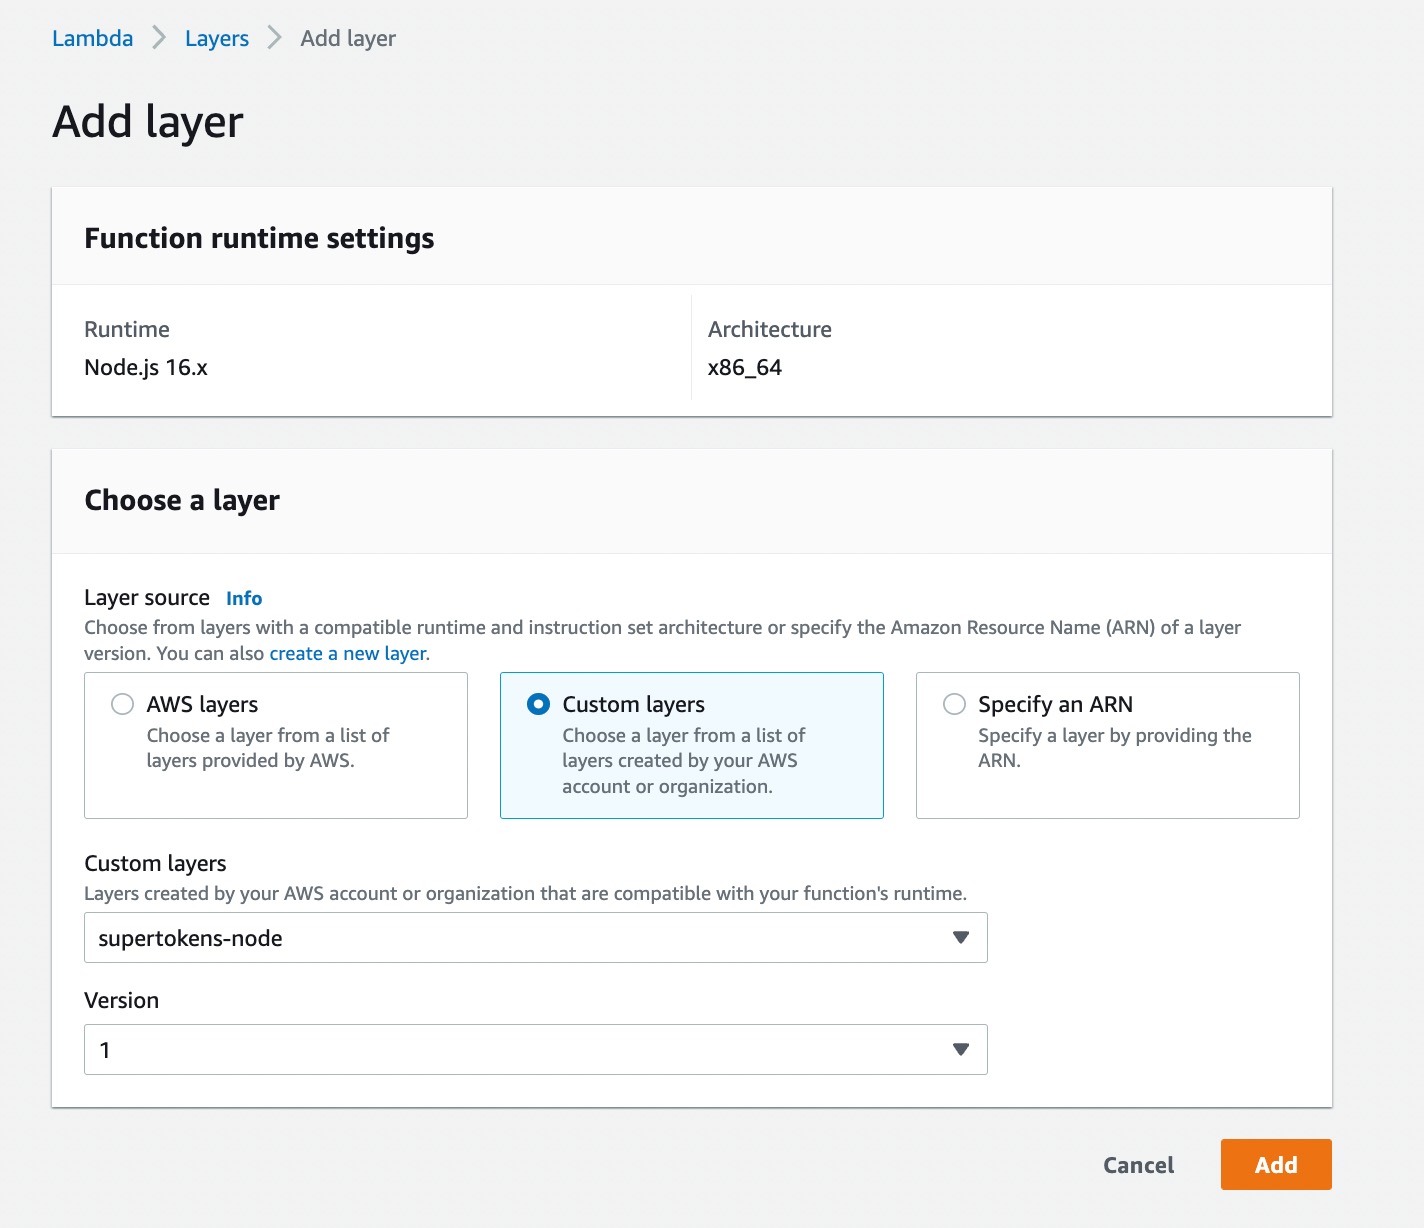
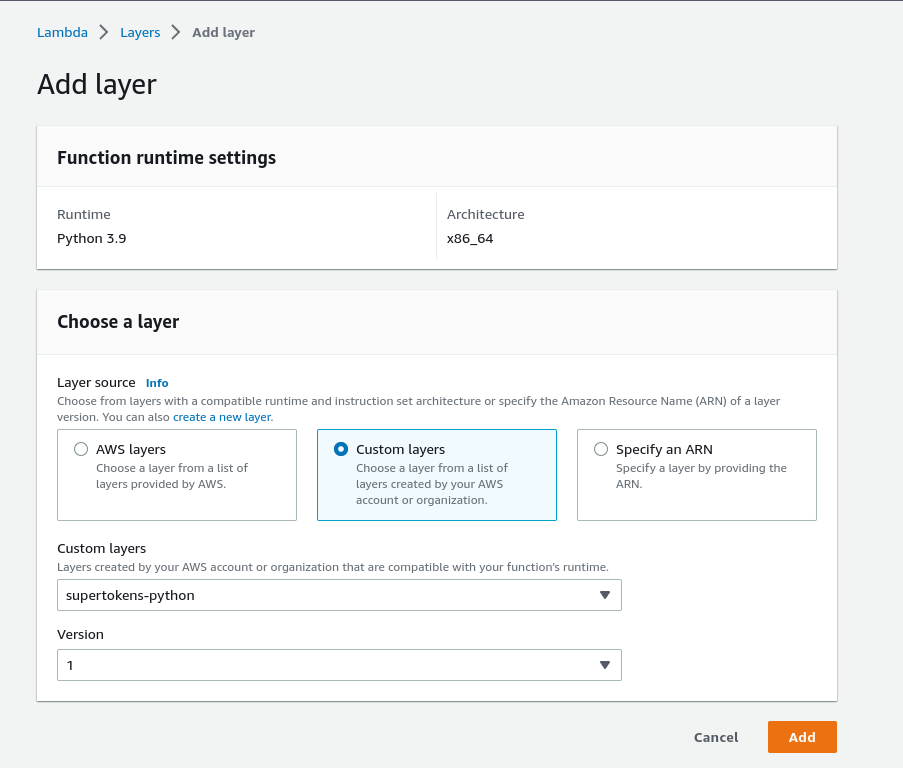
3) Link lambda layer with lambda function#
Scroll to the bottom and look for the
Layerstab. Click onAdd a layer
Select
Custom Layerand then select the layer we created in the first step:
- NodeJS
- Python
- Other Frameworks
Important
4) Create a backend config file#
Using the editor provided by AWS, create a new config file and write the following code:
- Single app setup
- Multi app setup
- NodeJS
- Python
- Other Frameworks
Important
import ThirdPartyEmailPassword from 'supertokens-node/recipe/thirdpartyemailpassword';
import Session from 'supertokens-node/recipe/session'

function getBackendConfig() {
  return {
    framework: "awsLambda",
    supertokens: {

      connectionURI: "",
      apiKey: "",
    },
    appInfo: {
      // learn more about this on https://supertokens.com/docs/emailpassword/appinfo
      appName: "<YOUR_APP_NAME>",
      apiDomain: "<YOUR_API_DOMAIN>",
      websiteDomain: "<YOUR_WEBSITE_DOMAIN>",
      apiBasePath: "/auth",
      websiteBasePath: "/auth",
      apiGatewayPath: "/dev"
    },
    recipeList: [
      ThirdPartyEmailPassword.init({
        // We have provided you with development keys which you can use for testing.
        // IMPORTANT: Please replace them with your own OAuth keys for production use.
        providers: [{
          config: {
            thirdPartyId: "google",
            clients: [{
              clientId: "1060725074195-kmeum4crr01uirfl2op9kd5acmi9jutn.apps.googleusercontent.com",
              clientSecret: "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"
            }]
          }
        }, {
          config: {
            thirdPartyId: "github",
            clients: [{
              clientId: "467101b197249757c71f",
              clientSecret: "e97051221f4b6426e8fe8d51486396703012f5bd"
            }]
          }
        }, {
          config: {
            thirdPartyId: "apple",
            clients: [{
              clientId: "4398792-io.supertokens.example.service",
              additionalConfig: {
                keyId: "7M48Y4RYDL",
                privateKey:
                  "-----BEGIN PRIVATE KEY-----\nMIGTAgEAMBMGByqGSM49AgEGCCqGSM49AwEHBHkwdwIBAQQgu8gXs+XYkqXD6Ala9Sf/iJXzhbwcoG5dMh1OonpdJUmgCgYIKoZIzj0DAQehRANCAASfrvlFbFCYqn3I2zeknYXLwtH30JuOKestDbSfZYxZNMqhF/OzdZFTV0zc5u5s3eN+oCWbnvl0hM+9IW0UlkdA\n-----END PRIVATE KEY-----",
                teamId: "YWQCXGJRJL",
              }
            }]
          }
        }],
      }),
      Session.init(),
    ],
    isInServerlessEnv: true,
  }
}

module.exports.getBackendConfig = getBackendConfig;
from supertokens_python import SupertokensConfig, InputAppInfo
from supertokens_python.recipe import session, thirdpartyemailpassword
from supertokens_python.recipe.thirdpartyemailpassword import Google, Github, Apple

supertokens_config=SupertokensConfig(
    connection_uri="",
    api_key=""
)

app_info=InputAppInfo(
    # learn more about this on https://supertokens.com/docs/thirdparty/appinfo
    app_name="<YOUR_APP_NAME>",
    api_domain="<YOUR_API_DOMAIN>",
    website_domain="<YOUR_WEBSITE_DOMAIN>",
    api_base_path="/auth",
    website_base_path="/auth",
    api_gateway_path="/dev",
)

framework="fastapi"

recipe_list=[
    session.init(),
    thirdpartyemailpassword.init(
      providers=[
        # We have provided you with development keys which you can use for testing.
        # IMPORTANT: Please replace them with your own OAuth keys for production use.
        Google(
            client_id='1060725074195-kmeum4crr01uirfl2op9kd5acmi9jutn.apps.googleusercontent.com',
            client_secret='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'
        # ), Facebook(
        #     client_id='FACEBOOK_CLIENT_ID',
        #     client_secret='FACEBOOK_CLIENT_SECRET'
        ), Github(
            client_id='467101b197249757c71f',
            client_secret='e97051221f4b6426e8fe8d51486396703012f5bd'
        ),
        Apple(
            client_id="4398792-io.supertokens.example.service",
            client_key_id="7M48Y4RYDL",
            client_private_key="-----BEGIN PRIVATE KEY-----\nMIGTAgEAMBMGByqGSM49AgEGCCqGSM49AwEHBHkwdwIBAQQgu8gXs+XYkqXD6Ala9Sf/iJXzhbwcoG5dMh1OonpdJUmgCgYIKoZIzj0DAQehRANCAASfrvlFbFCYqn3I2zeknYXLwtH30JuOKestDbSfZYxZNMqhF/OzdZFTV0zc5u5s3eN+oCWbnvl0hM+9IW0UlkdA\n-----END PRIVATE KEY-----",
            client_team_id="YWQCXGJRJL"
        )
    ]
    )
]
important
In the above code, notice the extra config of apiGatewayPath that was added to the appInfo object. The value of this should be whatever you have set as the value of your AWS stage which scopes your API endpoints. For example, you may have a stage name per dev environment:
- One for development (
/dev). - One for testing (
/test). - One for prod (
/prod).
So the value of apiGatewayPath should be set according to the above based on the env it's running under.
You also need to change the apiBasePath on the frontend config to append the stage to the path. For example, if the frontend is query the development stage and the value of apiBasePath is /auth, you should change it to /dev/auth.